How to configure Github Actions
A post about what Github Actions is, why it is useful, how to get it working on your project!
Intro
I’ve recently been playing with Github Actions and have been able to now integrate it with Wrapper.js.
This is super cool and opens up a load of exciting possibilities for speeding up deployment of apps by automating the wrapper script functions!
In this post, I’ll explain what Github Actions is and how it works, so you can then understand how it is implemented in Wrapper.js (so you can take what you like and implement it in your own projects) :D
What is Github Actions
Github Actions is a continuous integration and continuous delivery (CI/CD) platform that allows you to automate your tests, build and deployment pipeline.
In simple terms, it allows developers to automate testing and deployment of their apps, by simply pushing updates to their code repositories :)
Why is Github Actions useful
I’ve now integrated Github Actions with Wrapper.js, it’s useful because if you want to deploy an app (e.g a WebXR template) like this 👇

You can automate this deployment and better yet, spin up multiple environments (dev / stage / prod etc), all by just pushing code to your git repository — like this 👇
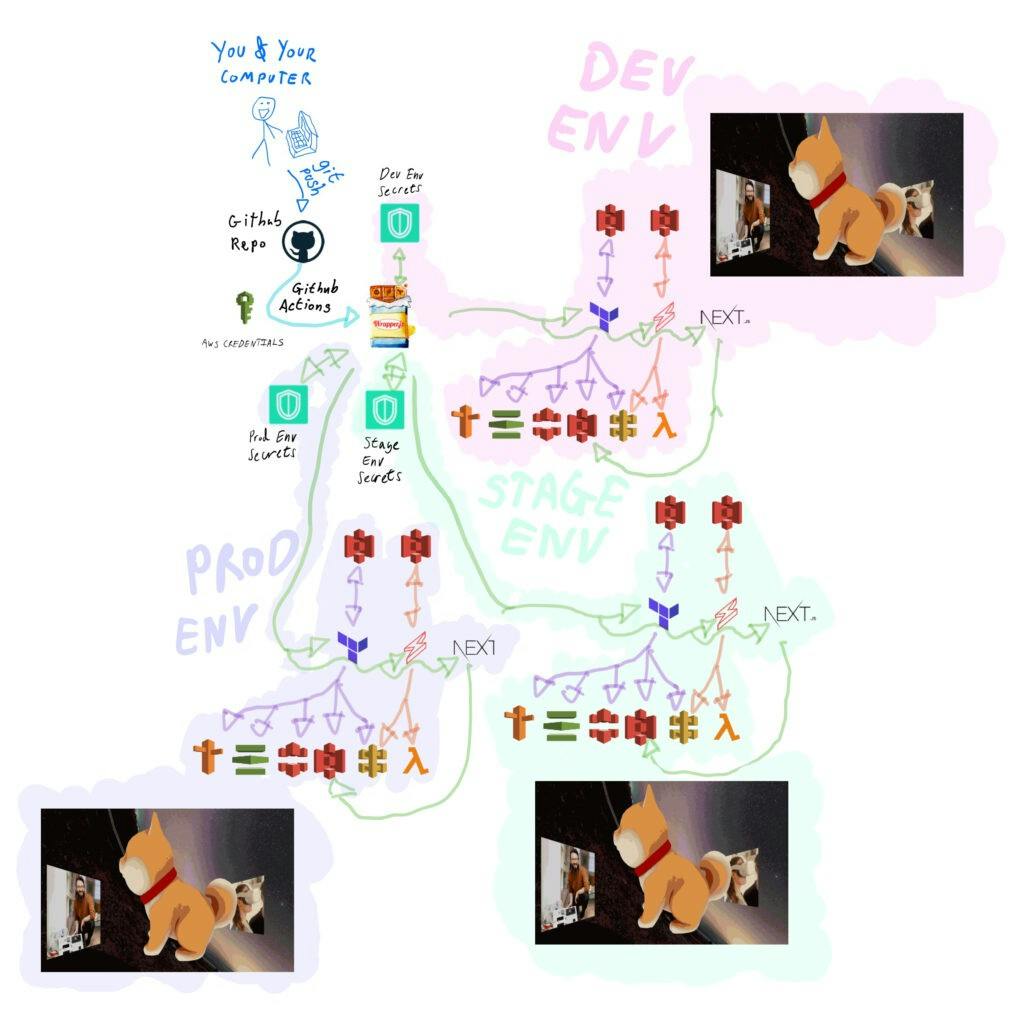
From the developers perspective, they develop a feature and commit their work to a branch in their code base — the pipeline takes are of deploying it into an environment that can then be viewed on its own url!
How it works
In the below steps, I’ll show how it is all pieced together.
I’ll demonstrate this using a Wrapper.js template as an example, you can extract what you’d like from this into your own set up.
Set up the project and pipeline
The first step, is to set up the Wrapper.js template and the Github repo for accessing your AWS account.
Adding AWS and Secret details to Github
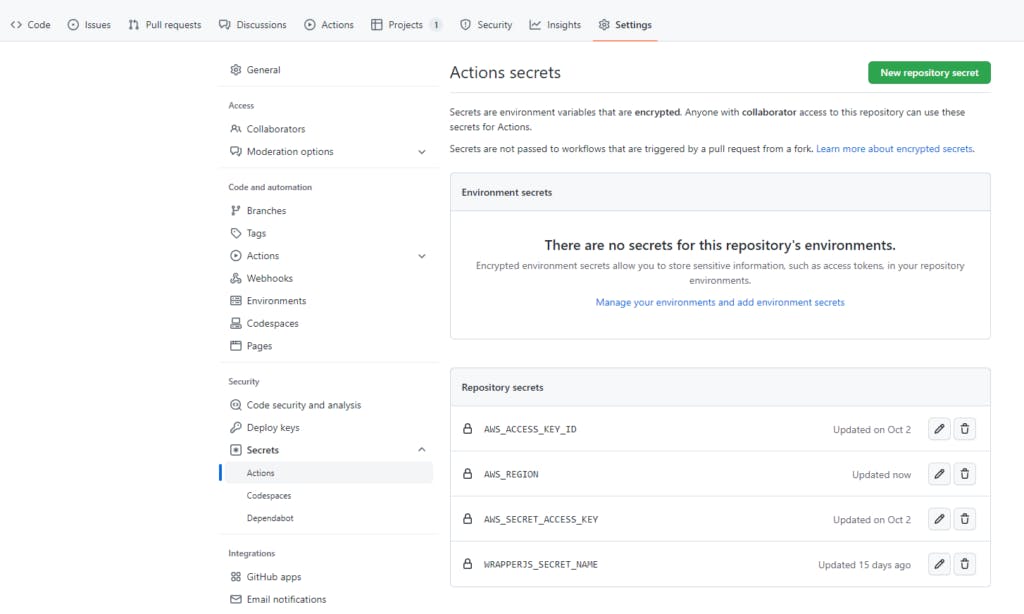
Create a Github repository for your project and then add your AWS credentials to the Repository Secrets.
You find this under ‘Settings’ > ‘Secrets’ > ‘Actions’, then click on the green ‘New repository secret’ button to add your AWS_REGION, AWS_ACCESS_KEY_ID and AWS_SECRET_ACCESS_KEY details.
Please note, you get these details from your AWS IAM credentials — never share these with anyone or post them online.
Lastly, add the name of your wrapper.js secret in as a Repository Secret called WRAPPERJS_SECRET_NAME.
Set up Wrapper.js Project
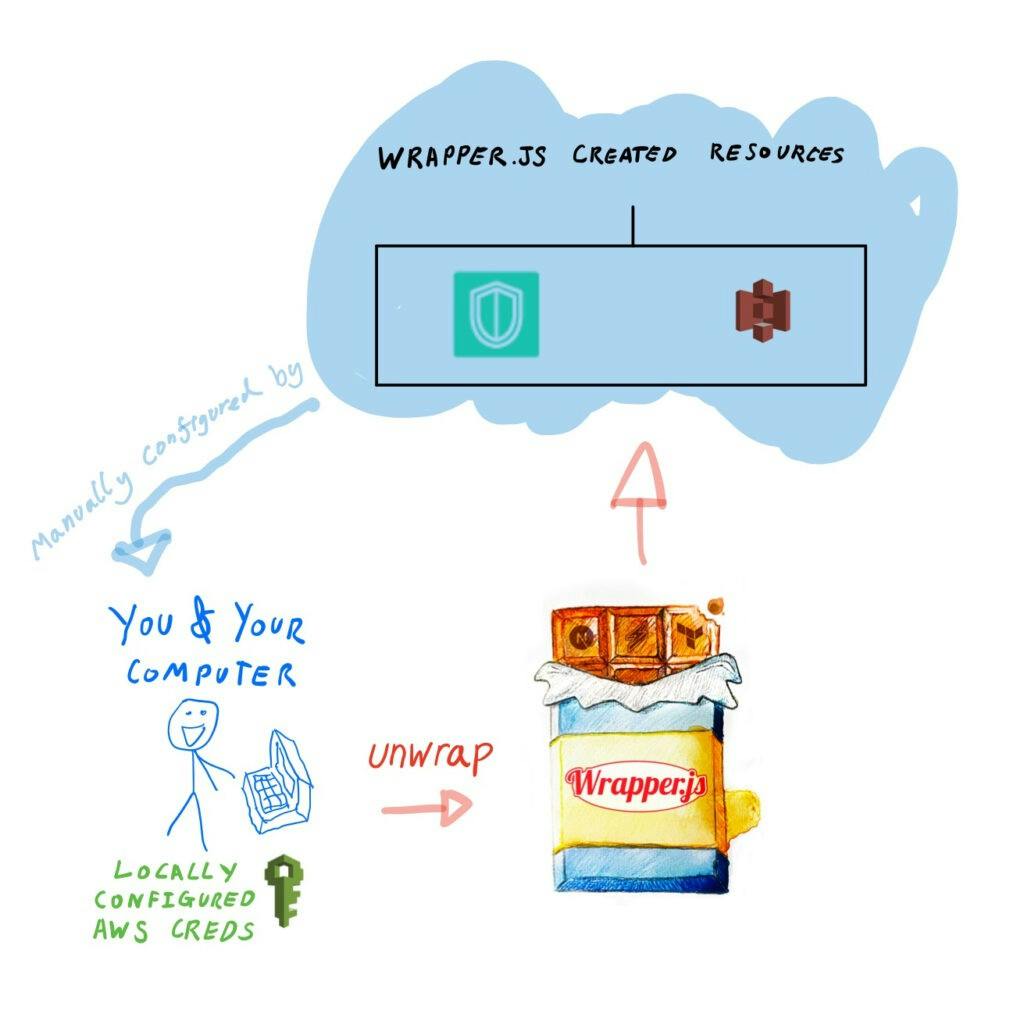
Set up your project, by following the steps outlined on this instruction page, until you get to the end of step 3.
Doing this will mean you have chosen a wrapper.js template and have used the unwrap CLI command configured your own project settings (domain name etc) that you’d like your app to be deployed with.
Run the pipeline automations
Now you have the basic project and github repository set up, the next step is to trigger the deployment and watch the automations do their work!
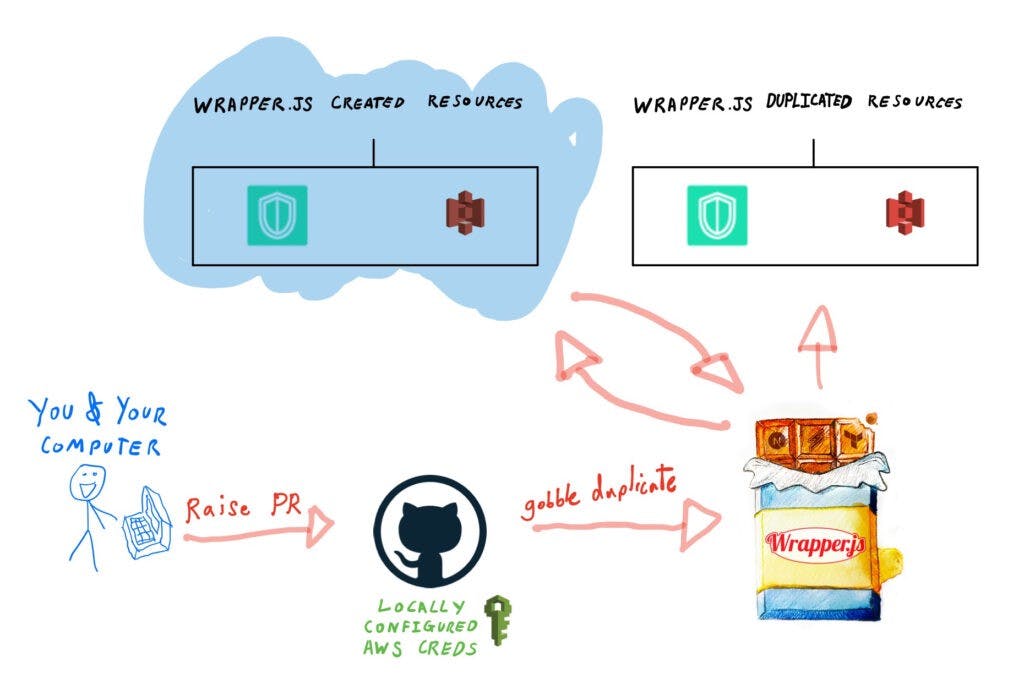
Raise a PR and trigger the automations
In this example, I’ll explain this as if you raised a Pull Request (PR) to the github repository. Please note, this process also works with pushing to master and creating a ‘release’.
When a PR is raised, the pipeline is activated and several automations happen:
- Github spins up a temporary virtual machine (VM) to run automations
- All necessary libraries (e.g Wrapper.js) are installed onto that VM
- During the setup processs, the AWS Credentials are configured
- Wrapper.js uses this AWS access, to retrieve the secret you configured for your project
- Wrapper.js then attempts to create a duplicate of this secret (if it doesn’t already exist), modifying the values for a PR environment
With all the above steps complete, the deployment process is ready to deploy your environment, using the newly duplicated Wrapper.js secret!
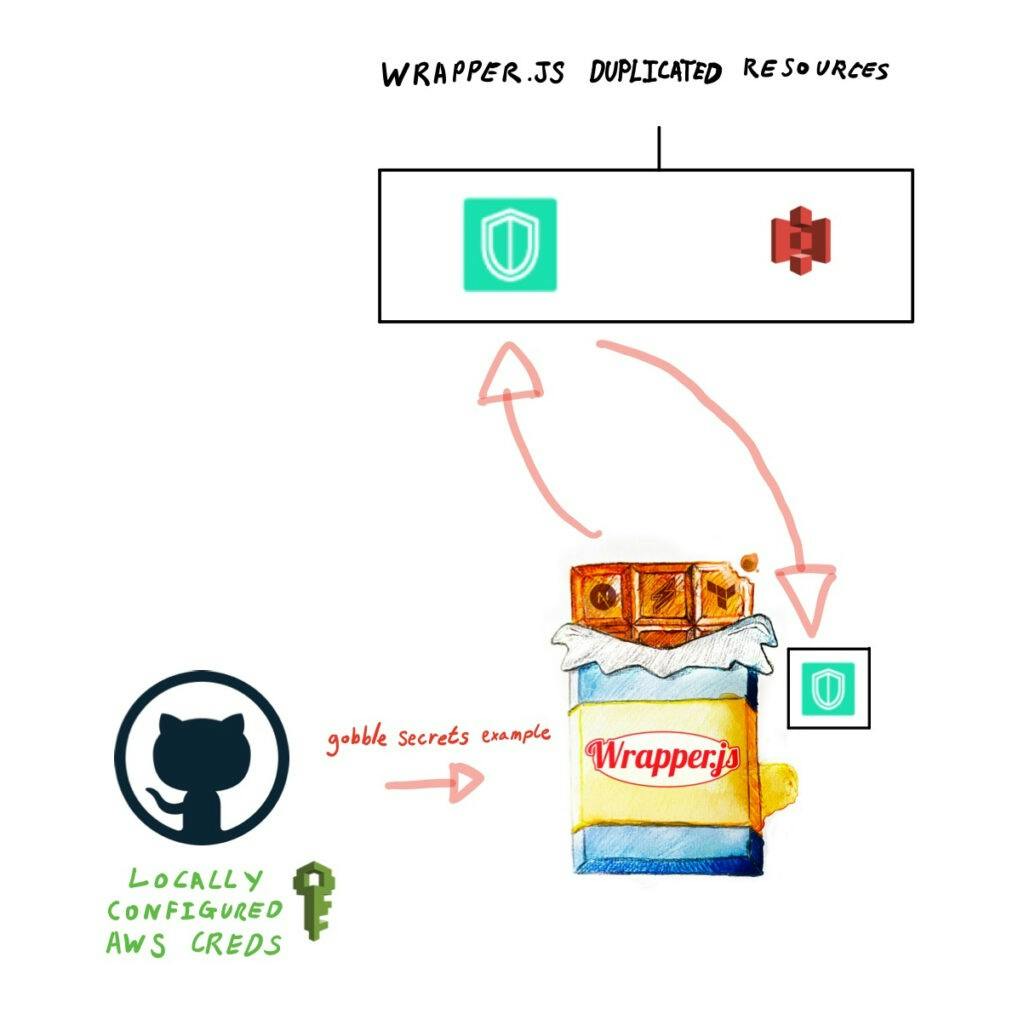
Retrieve secrets
Next, Github Actions runs the gobble secrets command to retrieve the duplicated secret and create a temporary .env file
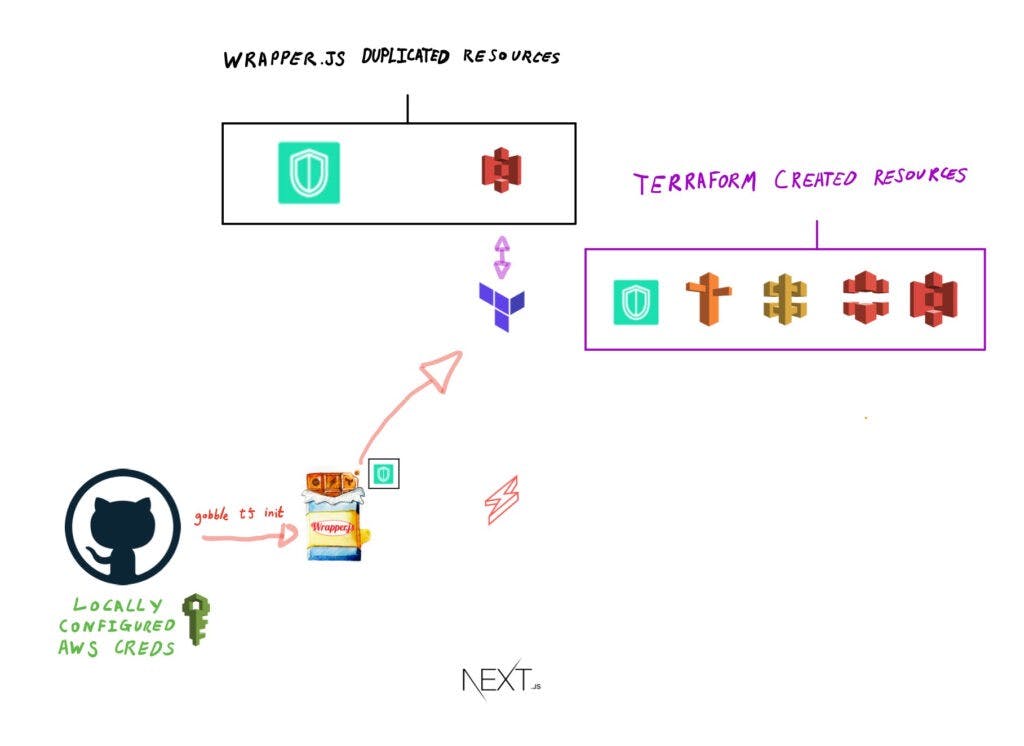
Dynamically create Terraform resources
With this .env file (saved as terraform.tfvars.json), it then runs:
- gobble tf init
- gobble tf plan
- gobble tf apply
This command essentially is initiating Terraform with the .env values, planning out what resources it is going to generate and then applies its plan to manage the selected cloud resources.
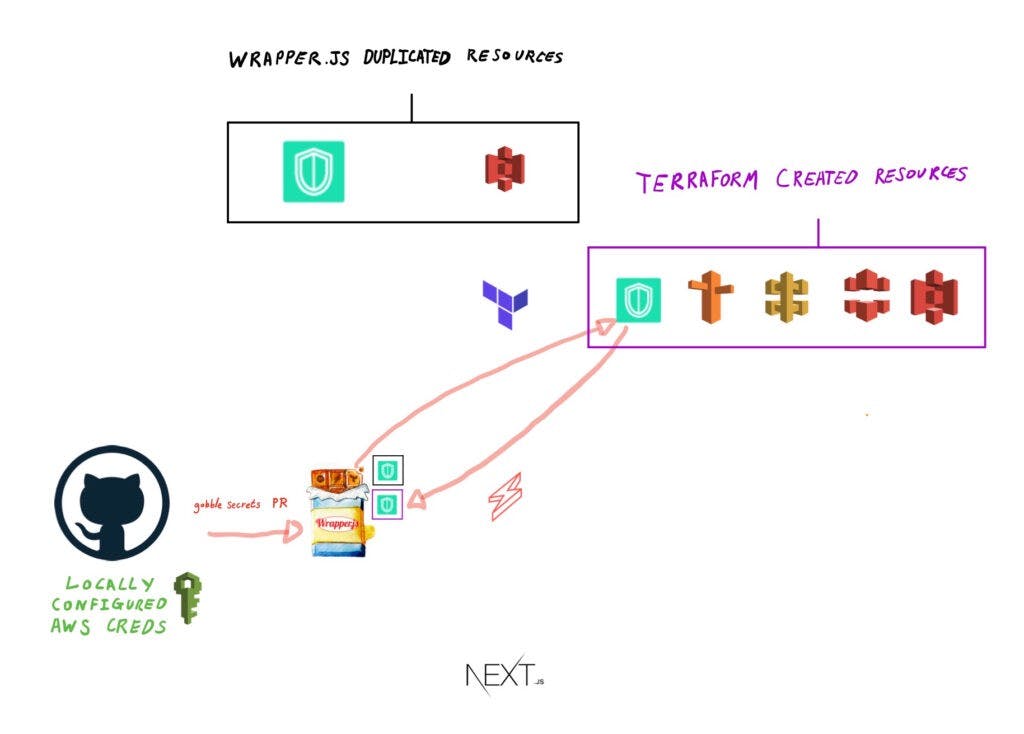
Retrieve secrets from Terraform resources
Once Terraform has finished running, the Github Actions pipeline then runs the gobble secrets command to retrieve the newly generated secrets file that Terraform has created.
This updates the locally generated .env file with new details from cloud resources like API Gateway and S3 etc, so the Front End and Back End can use them as part of their set up processes (coming up next).
Deploy Back End endpoints to the API
With the new details updated in the local .env file, the Github Actions pipeline then runs gobble sls deploy, which then deploys the lambda endpoints to the API Gateway.
Like with the previous terraform commands, these gobble commands inject the .env details (API Gateway variables) into the Serverless Framework config files, so that the lambda functions can be deployed to the correct API Gateway endpoints.
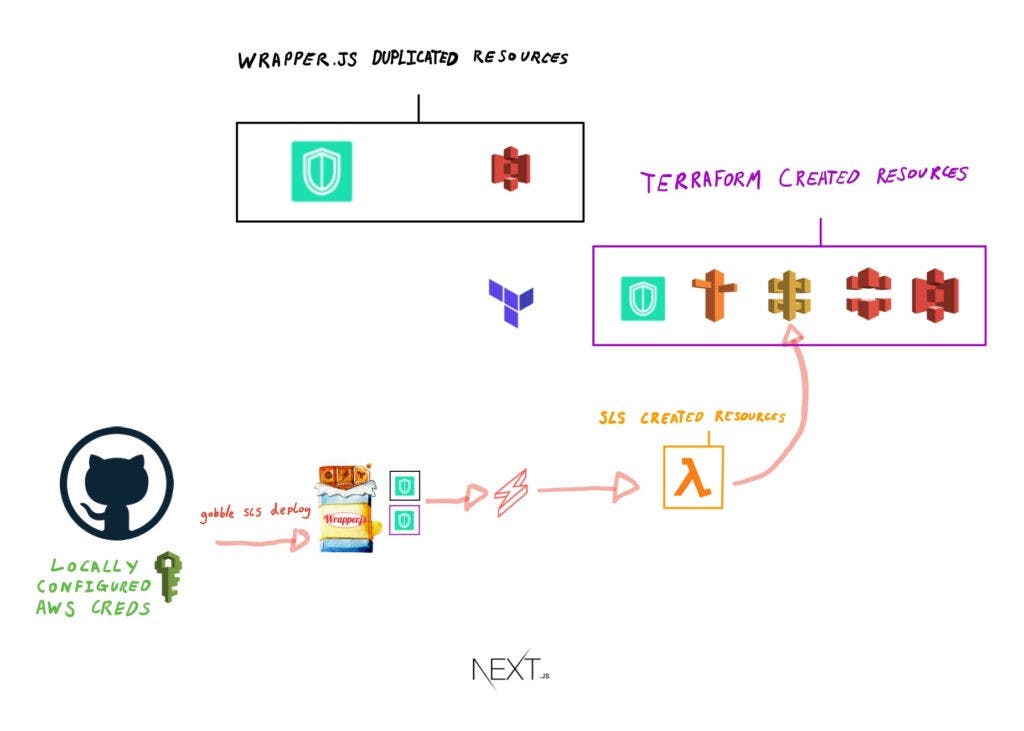
Deploy the statically hosted Front End
Lastly, Github Actions then runs gobble next export — which then creates a new static build of a Next.JS app and exports this to the S3 bucket whose details were originally generated from Terraform.
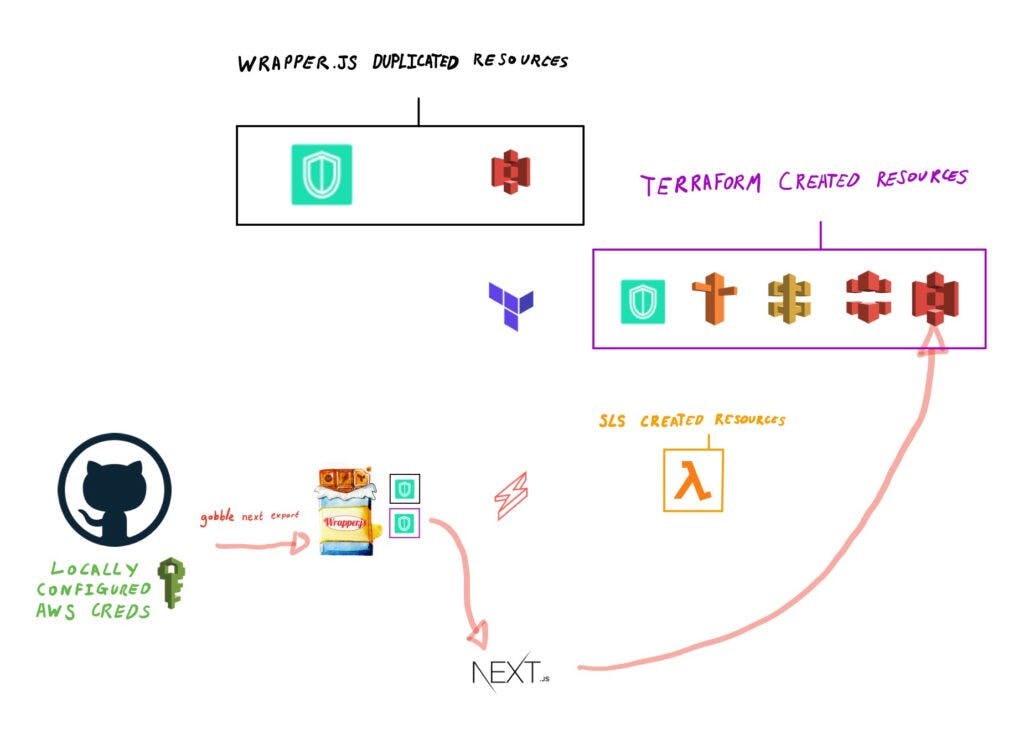
That is it, the pipeline has finished automating and the app is deployed! :D
Example pipeline config
I hope the above diagrams were useful from a visual perspective to understand what was going on.
Here is the yaml file, that turns those diagrams into actual useable Github Actions configuration :)
Conclusion
This has been a long blog post!
With any luck, you now understand what Github Actions is, why it is useful and how exciting it is that it can automate deployment of your app deployment!!
If you want to have a play, feel free to take a look at these Wrapper.js templates and have go :D
In the meantime, have fun making stuff!!

How to configure Github Actions was originally published on https://jamesmiller.blog.
